Quickstart
Overview
This document is meant to get a developer up and running with the Wattage Tile Engine as quickly as possible. This document will build upon the Wattage Tile Engine template which can be found here.
This document will first walk through the vanilla template, then proceed to add features in the following stages:
- Stage 1 - Use the onFrame event handler to move the camera back and forth. This will illustrate how to move the camera.
- Stage 2 - Extrude the walls to illustrate how scaling layers can result in one form of parallax. Achieving parallax scrolling by means of X and Y coefficients, see the example of loading file from Tiled here
- Stage 3 - Dim the ambient lighting and add a light to show how to use the lighting model.
- Stage 4 - Add more lights and use the tap event handler to toggle which light is on. This will illustrate how to remove lights from the lighting model.
- Stage 5 - Add a light which moves opposite the camera. This will illustrate how to update lights dynamically.
- Stage 6 - Add an entity to move around. This will illustrate how to use the EntityLayer and show how lighting affects the shading of the entities.
- Stage 7 - This stage will add a token to represent the player and activate the line of sight feature of the engine. This will illustrate the engine’s capability of hiding areas that would not be visible to the player.
- Stage 8 - This final stage will enable toggling the internal walls on and off. This illustrates how to dynamically add and remove walls and have the lighting and line of sight updated as well.
Additional Examples
- Example Loading a Tiled File - This will illustrate how Tiled can be used to create levels. It will also demonstrate parallax scrolling using X and Y coefficients.
Template Explanation
The template contains the boilerplate code needed to set up a project for the Wattage Tile Engine. It is hosted on Github here. When run, it should display a single plus sign shaped room as in the following image:
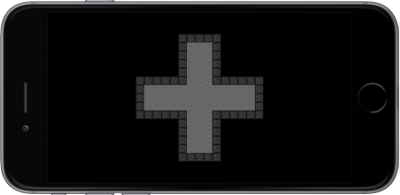
The template scene is copied below, and it contains comments explaining the significance of each section.
local Composer = require( "composer" )
local TileEngine = require "plugin.wattageTileEngine"

local scene = Composer.newScene()

-- -----------------------------------------------------------------------------------
-- This table represents a simple environment.  Replace this with
-- the model needed for your application.
-- -----------------------------------------------------------------------------------
local ENVIRONMENT = {
    {2,2,2,2,2,1,1,1,1,1,2,2,2,2,2},
    {2,2,2,2,2,1,0,0,0,1,2,2,2,2,2},
    {2,2,2,2,2,1,0,0,0,1,2,2,2,2,2},
    {2,2,2,2,2,1,0,0,0,1,2,2,2,2,2},
    {2,2,2,2,2,1,0,0,0,1,2,2,2,2,2},
    {1,1,1,1,1,1,0,0,0,1,1,1,1,1,1},
    {1,0,0,0,0,0,0,0,0,0,0,0,0,0,1},
    {1,0,0,0,0,0,0,0,0,0,0,0,0,0,1},
    {1,0,0,0,0,0,0,0,0,0,0,0,0,0,1},
    {1,1,1,1,1,1,0,0,0,1,1,1,1,1,1},
    {2,2,2,2,2,1,0,0,0,1,2,2,2,2,2},
    {2,2,2,2,2,1,0,0,0,1,2,2,2,2,2},
    {2,2,2,2,2,1,0,0,0,1,2,2,2,2,2},
    {2,2,2,2,2,1,0,0,0,1,2,2,2,2,2},
    {2,2,2,2,2,1,1,1,1,1,2,2,2,2,2},
}

local ROW_COUNT         = #ENVIRONMENT      -- Row count of the environment
local COLUMN_COUNT      = #ENVIRONMENT[1]   -- Column count of the environment

local tileEngine                            -- Reference to the tile engine
local lightingModel                         -- Reference to the lighting model
local tileEngineViewControl                 -- Reference to the UI view control
local lastTime                              -- Used to track how much time passes between frames

-- -----------------------------------------------------------------------------------
-- This will load in the example sprite sheet.  Replace this with the sprite
-- sheet needed for your application.
-- -----------------------------------------------------------------------------------
local spriteSheetInfo = require "tiles"
local spriteSheet = graphics.newImageSheet("tiles.png", spriteSheetInfo:getSheet())

-- -----------------------------------------------------------------------------------
-- A sprite resolver is required by the engine.  Its function is to create a
-- SpriteInfo object for the supplied key.  This function will utilize the
-- example sprite sheet.
-- -----------------------------------------------------------------------------------
local spriteResolver = {}
spriteResolver.resolveForKey = function(key)
    local frameIndex = spriteSheetInfo:getFrameIndex(key)
    local frame = spriteSheetInfo.sheet.frames[frameIndex]
    local displayObject = display.newImageRect(spriteSheet, frameIndex, frame.width, frame.height)
    return TileEngine.SpriteInfo.new({
        imageRect = displayObject,
        width = frame.width,
        height = frame.height
    })
end

-- -----------------------------------------------------------------------------------
-- A simple helper function to add floor tiles to a layer.
-- -----------------------------------------------------------------------------------
local function addFloorToLayer(layer)
    for row=1,ROW_COUNT do
        for col=1,COLUMN_COUNT do
            local value = ENVIRONMENT[row][col]
            if value == 0 then
                layer.updateTile(
                    row,
                    col,
                    TileEngine.Tile.new({
                        resourceKey="tiles_0"
                    })
                )
            elseif value == 1 then
                layer.updateTile(
                    row,
                    col,
                    TileEngine.Tile.new({
                        resourceKey="tiles_1"
                    })
                )
            end
        end
    end
end

-- -----------------------------------------------------------------------------------
-- This is a callback required by the lighting model to determine whether a tile
-- is transparent.  In this implementation, the cells with a value of zero are
-- transparent.  The engine may ask about the transparency of tiles that are outside
-- the boundaries of our environment, so the implementation must handle these cases.
-- That is why nil is checked for in this example callback.
-- -----------------------------------------------------------------------------------
local function isTileTransparent(column, row)
    local rowTable = ENVIRONMENT[row]
    if rowTable == nil then
        return true
    end
    local value = rowTable[column]
    return value == nil or value == 0
end

-- -----------------------------------------------------------------------------------
-- This is a callback required by the lighting model to determine whether a tile
-- should be affected by ambient light.  This simple implementation always returns
-- true which indicates that all tiles are affected by ambient lighting.  If an
-- environment had a section which should not be affected by ambient lighting, this
-- callback can be used to indicate that.  For example, the environment my be
-- an outdoor environment where the ambient lighting is the sun.  A few tiles in this
-- environment may represent the inside of a cabin, and these tiles would need to
-- not be affected by ambient lighting.
-- -----------------------------------------------------------------------------------
local function allTilesAffectedByAmbient(row, column)
    return true
end

-- -----------------------------------------------------------------------------------
-- This will be called every frame.  It is responsible for setting the camera
-- positiong, updating the lighting model, rendering the tiles, and reseting
-- the dirty tiles on the lighting model.
-- -----------------------------------------------------------------------------------
local function onFrame(event)
    local camera = tileEngineViewControl.getCamera()
    local lightingModel = tileEngine.getActiveModule().lightingModel

    if lastTime ~= 0 then
        -- Determine the amount of time that has passed since the last frame and
        -- record the current time in the lastTime variable to be used in the next
        -- frame.
        local curTime = event.time
        local deltaTime = curTime - lastTime
        lastTime = curTime

        -- Update the lighting model passing the amount of time that has passed since
        -- the last frame.
        lightingModel.update(deltaTime)
    else
        -- This is the first call to onFrame, so lastTime needs to be initialized.
        lastTime = event.time

        -- This is the initial position of the camera
        camera.setLocation(7.5, 7.5)

        -- Since a time delta cannot be calculated on the first frame, 1 is passed
        -- in here as a placeholder.
        lightingModel.update(1)
    end

    -- Render the tiles visible to the passed in camera.
    tileEngine.render(camera)

    -- The lighting model tracks changes, then acts on all accumulated changes in
    -- the lightingModel.update() function.  This call resets the change tracking
    -- and must be called after lightingModel.update().
    lightingModel.resetDirtyFlags()
end

-- -----------------------------------------------------------------------------------
-- Scene event functions
-- -----------------------------------------------------------------------------------

-- create()
function scene:create( event )
    local sceneGroup = self.view

    -- Create a group to act as the parent group for all tile engine DisplayObjects.
    local tileEngineLayer = display.newGroup()

    -- Create an instance of TileEngine.
    tileEngine = TileEngine.Engine.new({
        parentGroup=tileEngineLayer,
        tileSize=32,
        spriteResolver=spriteResolver,
        compensateLightingForViewingPosition=false,
        hideOutOfSightElements=false
    })

    -- The tile engine needs at least one Module.  It can support more than
    -- one, but this template sets up only one which should meet most use cases.
    -- A module is composed of a LightingModel and a number of Layers
    -- (TileLayer or EntityLayer).  An instance of the lighting model is created
    -- first since it is needed to instantiate the Module.
    lightingModel = TileEngine.LightingModel.new({
        isTransparent = isTileTransparent,
        isTileAffectedByAmbient = allTilesAffectedByAmbient,
        useTransitioners = false,
        compensateLightingForViewingPosition = false
    })

    -- Instantiate the module.
    local module = TileEngine.Module.new({
        name="moduleMain",
        rows=ROW_COUNT,
        columns=COLUMN_COUNT,
        lightingModel=lightingModel,
        losModel=TileEngine.LineOfSightModel.ALL_VISIBLE
    })

    -- Next, layers will be added to the Module...

    -- Create a TileLayer for the floor.
    local floorLayer = TileEngine.TileLayer.new({
        rows = ROW_COUNT,
        columns = COLUMN_COUNT
    })

    -- Use the helper function to populate the layer.
    addFloorToLayer(floorLayer)

    -- It is necessary to reset dirty tile tracking after the layer has been
    -- fully initialized.  Not doing so will result in unnecessary processing
    -- when the scene is first rendered which may result in an unnecessary
    -- delay (especially for larger scenes).
    floorLayer.resetDirtyTileCollection()

    -- Add the layer to the module at index 1 (indexes start at 1, not 0).  Set
    -- the scaling delta to zero.
    module.insertLayerAtIndex(floorLayer, 1, 0)

    -- Add the module to the engine.
    tileEngine.addModule({module = module})

    -- Set the module as the active module.
    tileEngine.setActiveModule({
        moduleName = "moduleMain"
    })

    -- To render the tiles to the screen, create a ViewControl.  This example
    -- creates a ViewControl to fill the entire screen, but one may be created
    -- to fill only a portion of the screen if needed.
    tileEngineViewControl = TileEngine.ViewControl.new({
        parentGroup = sceneGroup,
        centerX = display.contentCenterX,
        centerY = display.contentCenterY,
        pixelWidth = display.actualContentWidth,
        pixelHeight = display.actualContentHeight,
        tileEngineInstance = tileEngine
    })

    -- Finally, set the ambient light to white light with medium-high intensity.
    lightingModel.setAmbientLight(1,1,1,0.7)
end


-- show()
function scene:show( event )
    local sceneGroup = self.view
    local phase = event.phase

    if ( phase == "will" ) then
        -- Code here runs when the scene is still off screen (but is about to come on screen)

        -- Set the lastTime variable to 0.  This will indicate to the onFrame event handler
        -- that it is the first frame.
        lastTime = 0

        -- Register the onFrame event handler to be called before each frame.
        Runtime:addEventListener( "enterFrame", onFrame )
    elseif ( phase == "did" ) then
        -- Code here runs when the scene is entirely on screen
    end
end


-- hide()
function scene:hide( event )
    local sceneGroup = self.view
    local phase = event.phase

    if ( phase == "will" ) then
        -- Code here runs when the scene is on screen (but is about to go off screen)

        -- Remove the onFrame event handler.
        Runtime:removeEventListener( "enterFrame", onFrame )
    elseif ( phase == "did" ) then
        -- Code here runs immediately after the scene goes entirely off screen
    end
end


-- destroy()
function scene:destroy( event )

    local sceneGroup = self.view
    -- Code here runs prior to the removal of scene's view

    -- Destroy the tile engine instance to release all of the resources it is using
    tileEngine.destroy()
    tileEngine = nil

    -- Destroy the ViewControl to release all of the resources it is using
    tileEngineViewControl.destroy()
    tileEngineViewControl = nil

    -- Set the reference to the lighting model to nil.
    lightingModel = nil
end


-- -----------------------------------------------------------------------------------
-- Scene event function listeners
-- -----------------------------------------------------------------------------------
scene:addEventListener( "create", scene )
scene:addEventListener( "show", scene )
scene:addEventListener( "hide", scene )
scene:addEventListener( "destroy", scene )
-- -----------------------------------------------------------------------------------

return scene
Quickstart Stages
If you haven’t done so already, pull down the template project from Github here and follow through the changes introduced in each of the following stages.
Quickstart Stage 1
This stage will use the onFrame event handler to move the camera left and right. The first change necessary is inside of the onFrame function. The initial position of the camera has been changed to the first tile on the left of the room.
-- This is the initial position of the camera
camera.setLocation(0.5, 7.5)
The motion of the camera will move right then left and repeat. To implement this, the X position will increase until greater than or equal to 14.5, then decrease until less than or equal to 0.5 and repeat.
Two variables will be introduced, one to specify the speed and one to indicate the current direction.
local CAMERA_SPEED      = 4 / 1000          -- Camera speed, 4 tiles per second
local cameraDirection                       -- Tracks the direction of the camera
Initialize cameraDirection inside the scene:show() function.
cameraDirection = "right"
Finally, add the movement logic in the onFrame function.
-- Update the position of the camera
local curXPos = camera.getX()
local xDelta = CAMERA_SPEED * deltaTime
if cameraDirection == "right" then
    curXPos = curXPos + xDelta
    if curXPos > 14.5 then
        cameraDirection = "left"
        curXPos = 14.5 - (curXPos - 14.5)
    end
else
    curXPos = curXPos - xDelta
    if curXPos < 0.5 then
        cameraDirection = "right"
        curXPos = 0.5 + (0.5 - curXPos)
    end
end
camera.setLocation(curXPos, camera.getY())
When run, the plus sign shaped room should move left and right.
The code for this stage can be found here.
A video of the results can be found here.
Quickstart Stage 2
At this point, a camera is moving left and right above a plus sign shaped room. Its nice, but it looks a little flat. In this stage the walls will be extruded to give a sense of depth.
Add two constants to allow for tweaking. One will indicate how many extruded layers to create and the other will indicate the scaling delta between layers.
local WALL_LAYER_COUNT  = 4                 -- The number of extruded wall layers
local SCALING_DELTA     = 0.04              -- The scaling delta between wall layers
Next add a helper function to add the wall tiles to the new layers.
-- -----------------------------------------------------------------------------------
-- A simple helper function to add walls to a layer.
-- -----------------------------------------------------------------------------------
local function addWallsToLayer(layer)
    for row=1,ROW_COUNT do
        for col=1,COLUMN_COUNT do
            local value = ENVIRONMENT[row][col]
            if value == 1 then
                layer.updateTile(
                    row,
                    col,
                    TileEngine.Tile.new({
                        resourceKey="tiles_1"
                    }))
            end
        end
    end
end
Inside the scene:create() function, add the additional layers. It is important to reset the dirty tiles after creating each layer. Not doing so will result in unnecessary processing on the first render. Each layer will be added at the next index value. This results in adding each layer on top of the previous one. A scaling delta is also applied to each layer. This indicates the difference in scaling from the previous layer. This scaling delta is what results in the parallax scrolling.
-- Create extruded wall layers
for i=1,WALL_LAYER_COUNT do
    local wallLayer = TileEngine.TileLayer.new({
        rows = ROW_COUNT,
        columns = COLUMN_COUNT
    })
    addWallsToLayer(wallLayer)
    wallLayer.resetDirtyTileCollection()
    module.insertLayerAtIndex(wallLayer, i + 1, SCALING_DELTA)
end
When run, the plus sign shaped room should move left and right and the walls should be extruded to give a sense of depth.
The code for this stage can be found here.
A video of the results can be found here.
Quickstart Stage 3
At this point, there is a moving camera and extruded walls. Next, a light will be added to the scene.
First add a variable to store the light ID.
local topLightId -- Will track the ID of the top light
Within the scene:create() function, add a slightly yellowish light at the top, and dim the ambient lighting considerably.
-- Add a light at the top part of the room.
topLightId = lightingModel.addLight({
    row=5,column=8,r=1,g=1,b=0.7,intensity=0.75,radius=9
})

-- Finally, set the ambient light to white light with medium-high intensity.
lightingModel.setAmbientLight(1,1,1,0.15)
This will result in a much more dramatically lit environment. Feel free to tweak the light position, color, intensity, and radius to see how they modify the results.
The code for this stage can be found here.
A video of the results can be found here.
Quickstart Stage 4
In this stage, lights will be added to the other three corners and a tap listener will be added to cycle through the lights.
Add variables to track the other 3 lights.
local bottomLightId                         -- Will track the ID of the bottom light
local leftLightId                           -- Will track the ID of the left light
local rightLightId                          -- Will track the ID of the right light
Introduce a state machine with 4 states each of which has a single light lit.
local stateMachine = {}
stateMachine.init = function()
    -- Set initial state
    stateMachine.curState = 1

    -- Add a light at the top part of the room.
    topLightId = lightingModel.addLight({
        row=5,column=8,r=1,g=1,b=0.7,intensity=0.75,radius=9
    })
end
stateMachine.nextState = function()
    stateMachine.curState = stateMachine.curState + 1
    if stateMachine.curState > 4 then
        stateMachine.curState = 1
    end

    if stateMachine.curState == 1 then
        lightingModel.removeLight(leftLightId)
        leftLightId = nil
        topLightId = lightingModel.addLight({
            row=5,column=8,r=1,g=1,b=0.7,intensity=0.75,radius=9
        })
    end

    if stateMachine.curState == 2 then
        lightingModel.removeLight(topLightId)
        topLightId = nil
        rightLightId = lightingModel.addLight({
            row=8,column=11,r=0,g=0,b=1,intensity=0.75,radius=9
        })
    end

    if stateMachine.curState == 3 then
        lightingModel.removeLight(rightLightId)
        rightLightId = nil
        bottomLightId = lightingModel.addLight({
            row=11,column=8,r=0,g=1,b=0,intensity=0.75,radius=9
        })
    end

    if stateMachine.curState == 4 then
        lightingModel.removeLight(bottomLightId)
        bottomLightId = nil
        leftLightId = lightingModel.addLight({
            row=8,column=5,r=1,g=0,b=0,intensity=0.75,radius=9
        })
    end
end
Since the creation of the top light is now handled in the state machine, remove its declaration from the scene:create() function and replace it with a call to initialize the state machine.
stateMachine.init()
Create an event handler to listen for taps. This function will advance the state machine to the next state.
-- -----------------------------------------------------------------------------------
-- An event handler for screen taps.
-- -----------------------------------------------------------------------------------
local function tapListener()
    stateMachine.nextState()
end
In the scene:show() function during the “will” phase, register the tap listener.
-- Register an event listener to handle screen taps.
Runtime:addEventListener( "tap", tapListener )
This will call the tapListener() function on a screen tap which will result in switching to the next state and thus switching to the next light.
In the scene:hide() function during the “will” phase, unregister the tap listener.
-- Remove the event listener for taps
Runtime:removeEventListener( "tap", tapListener)
When run, the lights can be toggled by tapping the screen.
The code for this stage can be found here.
A video of the results can be found here.
Quickstart Stage 5
This stage will add a moving light to the scene. It will be the fifth state in the state machine and will move opposite the camera.
Add a constant to define the speed of the moving light.
local MOVING_LIGHT_SPEED= 4 / 1000 -- Moving light speed, 4 tiles per second
Add variables to track the moving light ID, the direction of the moving light, and the moving light X position. Lights are tracked at the tile coordinate level, so a variable is necessary to track the fractional tile position of the light. This value will be rounded to the nearest tile when updating the position of the light.
local movingLightId                         -- Will track the ID of the moving light
local movingLightDirection                  -- Tracks the direction of the moving light
local movingLightXPos                       -- Tracks the continous position of the moving light
In the state machine init() function, set the initial direction to “left”, which is the opposite starting direction of the camera. Also set the initial X position of 14.5 which will start the light opposite the camera.
-- Set the initial position and direction of the moving light
movingLightDirection = "left"
movingLightXPos = 14.5
Change the stateMachine.update() function to continuously track the position of the new light and update the light position if it is currently active.
stateMachine.update = function(deltaTime)
    local xDelta = MOVING_LIGHT_SPEED * deltaTime
    if movingLightDirection == "right" then
        movingLightXPos = movingLightXPos + xDelta
        if movingLightXPos > 14.5 then
            movingLightDirection = "left"
            movingLightXPos = 14.5 - (movingLightXPos - 14.5)
        end
    else
        movingLightXPos = movingLightXPos - xDelta
        if movingLightXPos < 0.5 then
            movingLightDirection = "right"
            movingLightXPos = 0.5 + (0.5 - movingLightXPos)
        end
    end
    if movingLightId ~= nil then
        lightingModel.updateLight({
            lightId = movingLightId,
            newRow = 8,
            newColumn = math.floor(movingLightXPos + 0.5)
        })
    end
end
Update the stateMachine.next() function to have a fifth state. This fifth state will activate the new moving light. Note that the first state needs to be updated to transition from the new fifth state. In other words, it needs to deactivate the moving light rather than the left light. Also notice that state 5 sets the “Use Transitioners” flag to true. With moving lights, transitioners will result in “fading” from one light state to the next giving a smoother look. State 1 disables transitioners because lights being switched on or off need to be instantaneous. You may want to try leaving the transitioners on for all states to see how that looks.
stateMachine.nextState = function()
    stateMachine.curState = stateMachine.curState + 1
    if stateMachine.curState > 5 then
        stateMachine.curState = 1
    end

    if stateMachine.curState == 1 then
        lightingModel.removeLight(movingLightId)
        movingLightId = nil
        topLightId = lightingModel.addLight({
            row=5,column=8,r=1,g=1,b=0.7,intensity=0.75,radius=9
        })
        lightingModel.setUseTransitioners(false)
    end

    if stateMachine.curState == 2 then
        lightingModel.removeLight(topLightId)
        topLightId = nil
        rightLightId = lightingModel.addLight({
            row=8,column=11,r=0,g=0,b=1,intensity=0.75,radius=9
        })
    end

    if stateMachine.curState == 3 then
        lightingModel.removeLight(rightLightId)
        rightLightId = nil
        bottomLightId = lightingModel.addLight({
            row=11,column=8,r=0,g=1,b=0,intensity=0.75,radius=9
        })
    end

    if stateMachine.curState == 4 then
        lightingModel.removeLight(bottomLightId)
        bottomLightId = nil
        leftLightId = lightingModel.addLight({
            row=8,column=5,r=1,g=0,b=0,intensity=0.75,radius=9
        })
    end

    if stateMachine.curState == 5 then
        lightingModel.removeLight(leftLightId)
        leftLightId = nil
        movingLightId = lightingModel.addLight({
            row=8,
            column=math.floor(movingLightXPos + 0.5),
            r=1,g=1,b=0.7,intensity=0.75,radius=9
        })
        lightingModel.setUseTransitioners(true)
    end
end
In the onFrame() event handler function, add a call to update the state machine and pass in the time delta. This must be done before calling the LightingModel.update() function.
-- Update the state machine
stateMachine.update(deltaTime)
When run, the lights can be toggled by tapping the screen.
The code for this stage can be found here.
A video of the results can be found here.
Quickstart Stage 6
This stage will add an entity which moves up and down the center of the room.
Add a constant to indicate the speed of the entity.
local ENTITY_SPEED = 4 / 1000 -- Speed of the entity, 4 tiles per second
Add three new variables. One to track the entity ID, one to track the entity direction and one to store a reference to the entity layer.
local entityId                              -- Will track the ID of the entity
local entityDirection                       -- Tracks the direction of the moving entity
local entityLayer                           -- Reference to the entity layer
In the scene:create() function, create the entity layer, add it to the module, and insert the entity. The layer will be added at index 2, just above the floor. The scaling delta is set to zero because the new layer should be scaled the same amount as the floor.
entityLayer = TileEngine.EntityLayer.new({
    tileSize = 32,
    spriteResolver = spriteResolver
})
module.insertLayerAtIndex(entityLayer, 2, 0)
entityId = entityLayer.addEntity("tiles_2")
Also note that since a new layer has been added, the index of each extruded wall layer needs to be increased by one. For this reason, the variable i is increase by 2 instead of 1 when inserting the wall layers into the module.
module.insertLayerAtIndex(wallLayer, i + 2, SCALING_DELTA)
In the scene:show() function, set the initial direction of the entity to “down”
-- Initialize the entity direction to "down"
entityDirection = "down"
Use the onFrame() function to set the initial position of the entity on the first frame.
-- Set the initial position of the entity
entityLayer.centerEntityOnTile(entityId, 3, 8)
The entity position will be updated in the onFrame() function as well. It will be added to the section that is executed on every frame after the first. Note that coordinates in the entity layer are set in units of tiles. This allows a coordinate to be set between two tiles. Because of this, the center of tiles are between integers. For example, the center of row 1, column 7 would be row 0.5 and column 6.5 when working in EntityLayer coordinates.
The code added here will move the entity from row 3, column 8 to row 13, column 8, then back again.
-- Update the position of the entity
local entityRow, entityCol = entityLayer.getEntityTilePosition(entityId)
local yDelta = ENTITY_SPEED * deltaTime
if entityDirection == "down" then
    entityRow = entityRow + yDelta
    if entityRow > 12.5 then
        entityDirection = "up"
        entityRow = 12.5 - (entityRow - 12.5)
    end
else
    entityRow = entityRow - yDelta
    if entityRow < 2.5 then
        entityDirection = "down"
        entityRow = 2.5 + (2.5 - entityRow)
    end
end
entityLayer.setEntityTilePosition(entityId, entityRow, entityCol)
When run, a yellow circle will move up and down in the middle of the plus sign shaped room. The lights can be toggled by tapping on the screen.
The code for this stage can be found here.
A video of the results can be found here.
Quickstart Stage 7
This stage will add a token to represent a player. The line of sight feature will be activated which results in not rendering tiles that are out of the line of sight of the player.
Changes in this stage fall into two categories: cosmetic and core. Core changes will be covered first.
Add a variable to track the player token’s ID.
local playerTokenId -- Will track the ID of the player token.
In the scene:create() function, create the player token in the entity layer.
playerTokenId = entityLayer.addEntity("tiles_3")
In the onFrame() function in the section which runs on the first frame, set the initial position of the player token.
-- Set the initial position of the player token
entityLayer.centerEntityOnTile(playerTokenId, 8, 2)
In the onFrame() function in the section which runs every frame after the first frame, update the position of the player token relative to the camera.
-- Set the entity position
entityLayer.setEntityTilePosition(playerTokenId, camera.getY(), curXPos)
Next, the tile engine needs to be configured to hide tiles that are not in the player’s line of sight. The first thing that needs to be done is to set the “compensateLightingForViewingPosition” variable to true and set the “hideOutOfSightElements” variable to true.
You may be wondering why the variable “compensateLightingForViewingPosition” is being set to true. Consider the case where an environment has a wall with a red light on one side and a green light on the other side. For many games, this wall should be yellow (a combination of red and green). However, for a game like a dungeon crawler, the player should only see the effects of one light, and which light depends on the player’s position. Setting this variable to true will result in either drawing the tile red or green depending on the player position.
-- Create an instance of TileEngine.
tileEngine = TileEngine.Engine.new({
    parentGroup=tileEngineLayer,
    tileSize=32,
    spriteResolver=spriteResolver,
    compensateLightingForViewingPosition=true,
    hideOutOfSightElements=true
})
Compensating lighting for viewing position requires additional book keeping by the lighting model. This requires a bit of additional processing, so it is disabled when not needed. Since it is needed, set “compensateLightingForViewingPosition” to true.
lightingModel = TileEngine.LightingModel.new({
    isTransparent = isTileTransparent,
    isTileAffectedByAmbient = allTilesAffectedByAmbient,
    useTransitioners = false,
    compensateLightingForViewingPosition = true
})
Create the line of sight model. The same isTransparent callback that was used for the lighting model can be used here. The radius represents the radius of the player’s max viewing circle.
-- An instance of LineOfSightModel is created for the module to
-- track which tiles are visible.
local lineOfSightModel = TileEngine.LineOfSightModel.new({
    radius = 20,
    isTransparent = isTileTransparent
})
Transitions between line of sight states can be configured to change smoothly over time. Here, the transition time is set to 225 milliseconds.
lineOfSightModel.setTransitionTime(225)
Up until this point, the ALL_VISIBLE line of sight model has been used. Now, the LineOfSightModel created above will be passed into the module.
-- Instantiate the module.
local module = TileEngine.Module.new({
    name="moduleMain",
    rows=ROW_COUNT,
    columns=COLUMN_COUNT,
    lightingModel=lightingModel,
    losModel=lineOfSightModel
})
In the onFrame() function, in the section that is run for the first frame, set the initial position for the line of sight model.
-- Set the initial position of the player to match the
-- position of the camera.  Pass in a time delta of 1 since this is
-- the first frame.
lineOfSightModel.update(8, 3, 1)
In the onFrame() function, in the section run every frame after the first, update the line of sight model for the current player position (which is the same as the camera). The tile coordinates must be integers, so Math.floor() is used to round to nearest integer.
-- Update the line of sight model passing the row and column for the current
-- point of view nad the amount of time that has passed
-- since the last frame.
lineOfSightModel.update(8, math.floor(curXPos + 0.5), deltaTime)
NOTE: The call to LineOfSightModel.update() must occur before the call to LightingModel.update().
Just like the lighting model, the line of sight model tracks a lot of things and must be reset at the end of every frame.
-- The line of sight model also tracks changes to the player position.
-- It is necessary to reset the change tracking to provide a clean
-- slate for the next frame.
lineOfSightModel.resetDirtyFlags()
The rest of the changes in this stage are cosmetic.
The environment has been changed to contain pillars.
local ENVIRONMENT = {
    {1,1,1,1,1,1,1,1,1,1,1,1,1,1,1},
    {1,0,0,0,0,0,0,0,0,0,0,0,0,0,1},
    {1,0,0,0,0,0,0,0,0,0,0,0,0,0,1},
    {1,0,0,0,0,0,0,0,0,0,0,0,0,0,1},
    {1,0,0,0,1,1,0,0,0,1,1,0,0,0,1},
    {1,0,0,0,1,1,0,0,0,1,1,0,0,0,1},
    {1,0,0,0,0,0,0,0,0,0,0,0,0,0,1},
    {1,0,0,0,0,0,0,0,0,0,0,0,0,0,1},
    {1,0,0,0,0,0,0,0,0,0,0,0,0,0,1},
    {1,0,0,0,1,1,0,0,0,1,1,0,0,0,1},
    {1,0,0,0,1,1,0,0,0,1,1,0,0,0,1},
    {1,0,0,0,0,0,0,0,0,0,0,0,0,0,1},
    {1,0,0,0,0,0,0,0,0,0,0,0,0,0,1},
    {1,0,0,0,0,0,0,0,0,0,0,0,0,0,1},
    {1,1,1,1,1,1,1,1,1,1,1,1,1,1,1},
}
The state machine has been updated with a number of changes.
- A new state has been added at the end to turn the ambient lighting up and all lights off in order to show the line of sight effects more clearly.
- The moving light has been moved to the initial state.
- The path of the moving light has been moved away from the walls.
local stateMachine = {}
stateMachine.init = function()
    -- Set initial state
    stateMachine.curState = 0

    -- Set the initial position and direction of the moving light
    movingLightDirection = "right"
    movingLightXPos = 1.5

    -- Set up for state 0
    movingLightId = lightingModel.addLight({
        row=8,
        column=math.floor(movingLightXPos + 0.5),
        r=1,g=1,b=0.7,intensity=0.75,radius=9
    })
    lightingModel.setUseTransitioners(true)
    lightingModel.setAmbientLight(1,1,1,0.15)
end
stateMachine.update = function(deltaTime)
    local xDelta = MOVING_LIGHT_SPEED * deltaTime
    if movingLightDirection == "right" then
        movingLightXPos = movingLightXPos + xDelta
        if movingLightXPos > 13.5 then
            movingLightDirection = "left"
            movingLightXPos = 13.5 - (movingLightXPos - 13.5)
        end
    else
        movingLightXPos = movingLightXPos - xDelta
        if movingLightXPos < 1.5 then
            movingLightDirection = "right"
            movingLightXPos = 1.5 + (1.5 - movingLightXPos)
        end
    end
    if movingLightId ~= nil then
        lightingModel.updateLight({
            lightId = movingLightId,
            newRow = 8,
            newColumn = math.floor(movingLightXPos + 0.5)
        })
    end
end
stateMachine.nextState = function()
    stateMachine.curState = stateMachine.curState + 1
    if stateMachine.curState > 5 then
        stateMachine.curState = 0
    end

    if stateMachine.curState == 0 then
        movingLightId = lightingModel.addLight({
            row=8,
            column=math.floor(movingLightXPos + 0.5),
            r=1,g=1,b=0.7,intensity=0.75,radius=9
        })
        lightingModel.setUseTransitioners(true)
        lightingModel.setAmbientLight(1,1,1,0.15)
    end

    if stateMachine.curState == 1 then
        lightingModel.removeLight(movingLightId)
        movingLightId = nil
        topLightId = lightingModel.addLight({
            row=5,column=8,r=1,g=1,b=0.7,intensity=0.75,radius=9
        })
        lightingModel.setUseTransitioners(false)
    end

    if stateMachine.curState == 2 then
        lightingModel.removeLight(topLightId)
        topLightId = nil
        rightLightId = lightingModel.addLight({
            row=8,column=11,r=0,g=0,b=1,intensity=0.75,radius=9
        })
    end

    if stateMachine.curState == 3 then
        lightingModel.removeLight(rightLightId)
        rightLightId = nil
        bottomLightId = lightingModel.addLight({
            row=11,column=8,r=0,g=1,b=0,intensity=0.75,radius=9
        })
    end

    if stateMachine.curState == 4 then
        lightingModel.removeLight(bottomLightId)
        bottomLightId = nil
        leftLightId = lightingModel.addLight({
            row=8,column=5,r=1,g=0,b=0,intensity=0.75,radius=9
        })
    end

    if stateMachine.curState == 5 then
        lightingModel.removeLight(leftLightId)
        leftLightId = nil
        lightingModel.setAmbientLight(1,1,1,0.75)
    end
end
The camera path is changed to prevent it from passing over walls since the player token is synced with it.
Update each frame…
-- Update the position of the camera
local curXPos = camera.getX()
local xDelta = CAMERA_SPEED * deltaTime
if cameraDirection == "right" then
    curXPos = curXPos + xDelta
    if curXPos > 13.5 then
        cameraDirection = "left"
        curXPos = 13.5 - (curXPos - 13.5)
    end
else
    curXPos = curXPos - xDelta
    if curXPos < 1.5 then
        cameraDirection = "right"
        curXPos = 1.5 + (1.5 - curXPos)
    end
end
camera.setLocation(curXPos, camera.getY())
Update initial position…
-- This is the initial position of the camera
camera.setLocation(1.5, 7.5)
Finally, ambient lighting is no longer set in the scene:onCreate() function.
When run, areas of the environment that the player would not be able to see will be blacked out. The lights can be toggled by tapping on the screen.
The code for this stage can be found here.
A video of the results can be found here.
Quickstart Stage 8
This stage will enable toggling the existence of the columns in the room. A button will be added to separate this functionality from tapping the screen to toggle the lights.
Add a variable to store the toggle button.
local toggleWallsButton -- Reference to the toggle botton
Add a helper function to clear the wall from a tile. This function will do the following for the specified tile:
- Change the floor layer tile from a wall to a floor.
- Skip the entity layer at index 2 and from index 3 on up, clear out the tiles by setting the value to nil.
- Notify the LightingModel that transparency has changed so that it knows to update itself appropriately.
- Make the line of sight model as dirty so it can recompute.
local function clearWall(row, column)
    ENVIRONMENT[row][column] = 0
    local module = tileEngine.getActiveModule()
    module.layers[1].layer.updateTile(row, column, TileEngine.Tile.new({
        resourceKey="tiles_0"
    }))
    for i=3,#module.layers do
        module.layers[i].layer.updateTile(row, column, nil)
    end
    module.lightingModel.markChangeInTransparency(row, column)
    module.losModel.makeDirty()
end
Add a helper function to add a wall to a tile. This function will do the following for the specified tile:
- Change the floor layer tile from a floor to a wall.
- Skip the entity layer at index 2 and from index 3 on up, add wall tiles.
- Notify the LightingModel that transparency has changed so that it knows to update itself appropriately.
- Make the line of sight model as dirty so it can recompute.
local function addWall(row, column)
    ENVIRONMENT[row][column] = 1
    local module = tileEngine.getActiveModule()
    module.layers[1].layer.updateTile(row, column, TileEngine.Tile.new({
        resourceKey="tiles_1"
    }))
    for i=3,#module.layers do
        module.layers[i].layer.updateTile(row, column, TileEngine.Tile.new({
            resourceKey="tiles_1"
        }))
    end
    module.lightingModel.markChangeInTransparency(row, column)
    module.losModel.makeDirty()
end
Add a new state machine to track the state of pillars. The state machine has 6 states:
- All pillars
- None
- Top left only
- Top right only
- Bottom left only
- Bottom right only
local pillarStateMachine = {}
pillarStateMachine.init = function()
    pillarStateMachine.curState = 1
end
pillarStateMachine.nextState = function()
    pillarStateMachine.curState = pillarStateMachine.curState + 1
    if pillarStateMachine.curState > 6 then
        pillarStateMachine.curState = 1
    end

    if pillarStateMachine.curState == 1 then
        addWall(5,5)
        addWall(6,5)
        addWall(5,6)
        addWall(6,6)

        addWall(5,10)
        addWall(6,10)
        addWall(5,11)
        addWall(6,11)

        addWall(10,5)
        addWall(11,5)
        addWall(10,6)
        addWall(11,6)
    end

    if pillarStateMachine.curState == 2 then
        clearWall(5,5)
        clearWall(6,5)
        clearWall(5,6)
        clearWall(6,6)

        clearWall(5,10)
        clearWall(6,10)
        clearWall(5,11)
        clearWall(6,11)

        clearWall(10,5)
        clearWall(11,5)
        clearWall(10,6)
        clearWall(11,6)

        clearWall(10,10)
        clearWall(11,10)
        clearWall(10,11)
        clearWall(11,11)
    end

    if pillarStateMachine.curState == 3 then
        addWall(5,5)
        addWall(6,5)
        addWall(5,6)
        addWall(6,6)
    end

    if pillarStateMachine.curState == 4 then
        clearWall(5,5)
        clearWall(6,5)
        clearWall(5,6)
        clearWall(6,6)

        addWall(5,10)
        addWall(6,10)
        addWall(5,11)
        addWall(6,11)
    end

    if pillarStateMachine.curState == 5 then
        clearWall(5,10)
        clearWall(6,10)
        clearWall(5,11)
        clearWall(6,11)

        addWall(10,5)
        addWall(11,5)
        addWall(10,6)
        addWall(11,6)
    end

    if pillarStateMachine.curState == 6 then
        clearWall(10,5)
        clearWall(11,5)
        clearWall(10,6)
        clearWall(11,6)

        addWall(10,10)
        addWall(11,10)
        addWall(10,11)
        addWall(11,11)
    end
end
Add an event handler for the “toggle walls” button. It advances the state of the state machine and returns true to indicate that the click was handled.
-- -----------------------------------------------------------------------------------
-- An event handler for toggling walls.
-- -----------------------------------------------------------------------------------
local function toggleWalls()
    pillarStateMachine.nextState()
    return true
end
Since walls will be added and removed, line of sight transitions are set to occur instantaneously for aesthetics. The following is added to the scene:create() function.
lineOfSightModel.setTransitionTime(0)
Also, in the scene:create() function, initialize the pillar state machine.
pillarStateMachine.init()
Add the toggle button.
-- Button to toggle walls
toggleWallsButton = display.newImageRect("toggleWalls.png", 237, 64)
toggleWallsButton.x = display.screenOriginX + 237 / 2 + 5
toggleWallsButton.y = display.screenOriginY + 64 / 2 + 5
In the “will show” section of scene:show(), register the listener.
toggleWallsButton:addEventListener("tap", toggleWalls)
In the “will hide” section of scene:hide(), remove the listener.
toggleWallsButton:removeEventListener("tap", toggleWalls)
In the scene:destroy() function, release the toggle button.
toggleWallsButton:removeSelf()
toggleWallsButton = nil
When run, a toggle button will be displayed in the top left corner. When clicked it will cycle through all the visibility states of the walls. The lights can be toggled by tapping on the screen.
The code for this stage can be found here.
A video of the results can be found here.